Plumeria crochet pattern Blog
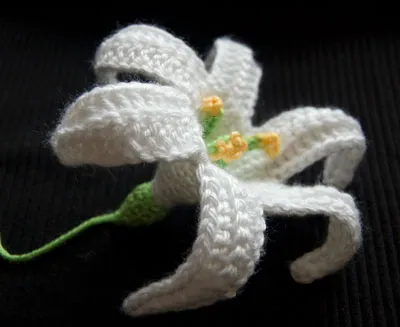
Crochet a touch of the tropics with these exotic plumeria blossoms. Use a plumeria flower to make a beautiful pin or hair accessory, or to embellish anything!
The pattern includes three different petal designs – choose your own colours to make custom blooms.
The complete pattern and instructions are available below, regardless of whether or not you choose to pay for them 🙂 As it’s such a long pattern, if you plan to print it I highly recommend the PDF version – it’s nicely formatted to print neatly onto 7 pages, with captioned figures etc – but the choice is yours.
Terminology
Notes
- Do not join at the end of each round; rounds are worked in continuous spirals.
- Use a stitch marker to mark the beginning of each round. Move the marker up each time you start a new round.
You will need…
- E US/3.5mm crochet hook
- Small amount of worsted weight yarn in one or two colours (e.g. white, pink, yellow)
- Yarn needle
- Stitch marker
I used worsted weight yarn and a size E hook, which produced a large 3.5″ diameter flower. Try using a finer yarn or crochet thread with a correspondingly smaller hook to give a more compact flower.
Crochet Instructions
For each flower, you will need5 matching petals. There are three petal designs to choose from: all have the same shape, but different colour patterns (in order of difficulty from easiest):1. Solid colour2. Smooth centres3. Ragged centres
Colour codeAmain colourBcontrast colour (centres of petals, Designs 2 and 3 only)
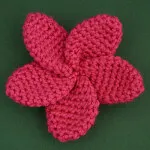
Petal Design 1 (solid colour)worked from tip to centreWithA, make amagic ring, ch 1.Rnd 1: 4 sc in magic ring. (4 st)Rnd 2: 2 sc in each st around. (8 st)Rnd 3: (2 sc in next st, sc in next st) four times. (12 st)Rnd 4: sc in each st around. (12 st)Rnd 5: (2 sc in next st, sc in next 5 st) twice. (14 st)Rnd 6: (2 sc in next st, sc in next 6 st) twice. (16 st)Rnds 7-8: sc in each st around. (16 st)Rnd 9: (invdec, sc in next 6 st) twice. (14 st)Rnd 10: (invdec, sc in next 5 st) twice. (12 st)Rnd 11: invdec, sc in next 4 st, invdec, sc in next 3 st, sl st in next st. (10 st)Fasten off.Note:You may either weave in the yarn end so it is hidden inside the petal, or, for less work, leave it dangling for now and hide it later at the back of the flower.
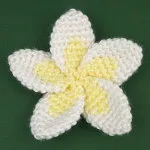
Petal Design 2 (smooth centres)worked from tip to centreWithA, make amagic ring, ch 1.Rnd 1: 4 sc in magic ring. (4 st)Rnd 2: 2 sc in each st around. (8 st)Rnd 3: (2 sc in next st, sc in next st) four times. (12 st)Rnd 4: sc in each st around. (12 st)Rnd 5: (2 sc in next st, sc in next 5 st) twice. (14 st)
Rnd 7: sc in each st around as follows: 10A, 4B, 2A. (16 st)Rnd 8: sc in each st around as follows: 10A, 5B, 1A. (16 st)
Fasten off.Note:You may either weave in the yarn ends so they are hidden inside the petal, or, for less work, leave them dangling for now and hide them later at the back of the flower.
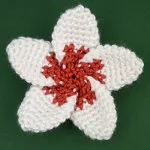
Petal Design 3 (ragged centres)worked from tip to centreWithA, make amagic ring, ch 1.Rnd 1: 4 sc in magic ring. (4 st)Rnd 2: 2 sc in each st around. (8 st)Rnd 3: (2 sc in next st, sc in next st) four times. (12 st)Rnd 4: sc in each st around. (12 st)Rnd 5: (2 sc in next st, sc in next 5 st) twice. (14 st)Rnd 6: (2 sc in next st, sc in next 6 st) twice. (16 st)Rnd 7: sc in each st around. (16 st)Rnd 8: sc in each st around as follows: 10A, 2B, 1A, 2B, 1A. (16 st)
Fasten off.Note:You may either weave in the yarn ends so they are hidden inside the petal, or, for less work, leave them dangling for now and hide them later at the back of the flower.
Backing (optional)With A, make amagic ring, ch 1.Rnd 1: 6 sc in magic ring. (6 st)Rnd 2: 2 sc in each st around. (12 st)Join with sl st to next stitch. Fasten off, leaving a long end of yarn.
Assembly Instructions
The petals of a plumeria flower are arranged in a distinctive spiral. It’s not difficult to do, provided you follow my assembly instructions. This assembly is a little time-consuming because it has several steps, but I think it’s worth it to make the petals spiral beautifully!
Step 1Flatten out each petal.
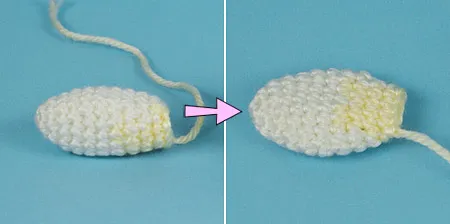
Design 1:the increases and decreases should lie along the edges of each petal.Designs 2 & 3:centre the contrasting inner colour on the top of each petal.
Step 2Thread a yarn needle with a 12” length of yarn(Designs 2 & 3:use colourB). Place one petal directly on top of another, with the fronts of both petals facing towards you. Offset the top petal by shifting it very slightly to the right.
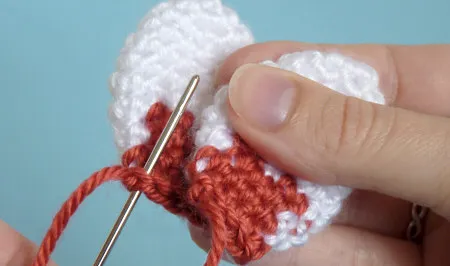
Using the length of yarn, stitch through the lower left corner of the top petal, through the lower left corner of the bottom petal, and back through the same corner of the top petal. Draw the stitch tight to minimise the offset between the petals.Note:The smaller you can make the offset, the smaller the hole remaining in the centre of the flower will be.
Repeat this three more times: each time add one more petal on top of the group, offset it very slightly to the right, and stitch the lower left corner to the same corner of the petal below. When you’ve finished, the 5 petals should all be stacked together in a row.Note:Do not fasten off yet!
Fan the petals out clockwise around the joined centre, to form a flower shape. Arrange the first (bottom) petal so its left corner is above the left corner of the last (top) petal, and stitch this final petal corner in place. Fasten off and weave in the ends.
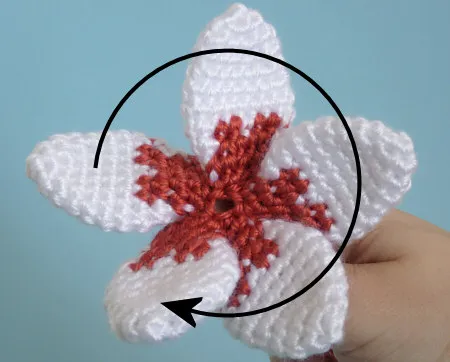
Step 3Turn the flower over. As it is only held together by one corner of each petal, you’ll see that the remaining corner at the base of each petal is still free to flap about. In this step, you’ll stitch those corners together to complete the spiral effect and lock the petals together.
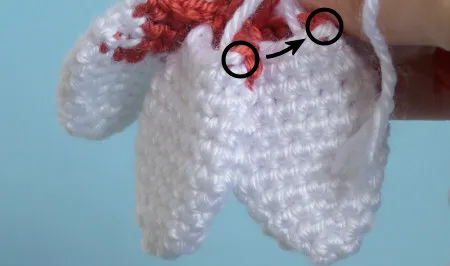
Thread a yarn needle with a 12” length of yarn(Designs 2 & 3:use colourA). Stitch through the free corner of the first petal, through the free corner of the second petal, and back through the same corner of the first petal, and draw tight. Repeat for the remaining petals, until all 5 corners are stitched together at the back of the flower. Fasten off and weave in the ends.
Step 4Use your finger to curve each petal along its length by pushing up both sides, so the middle is indented.
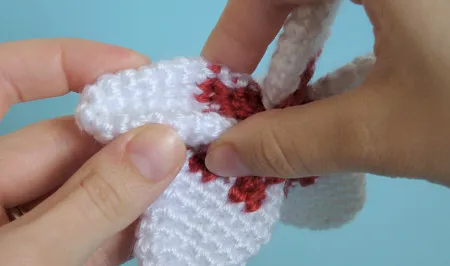
Don’t worry if your flower looks more like a propellor than a pretty blossom at this stage – there’s still one more step needed to complete the assembly magic!
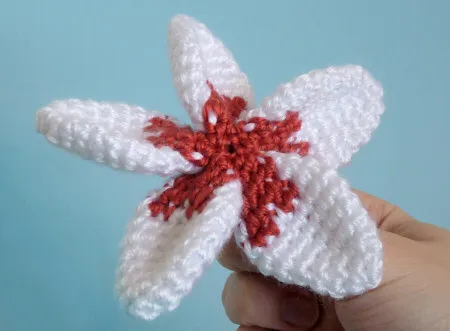
Step 5Draw your hands up around the base of the flower and squeeze gently so the petals are forced to spiral upwards and together.
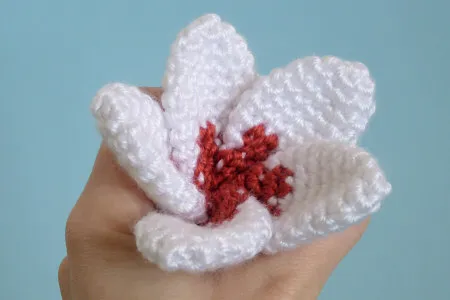
When you release the flower, the petals will spring back, but should still overlap. You’ll lock them into this overlapping configuration to make the separate petals into one complete blossom.
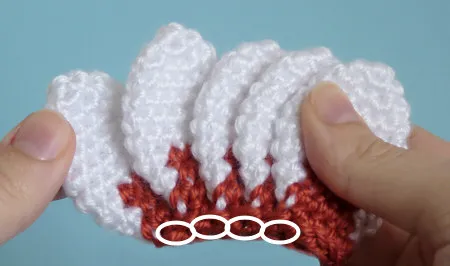
Turn the flower over to the back. Thread a yarn needle with an 18” length of yarn(Designs 2 & 3:use colourA). You’ll be stitching the petals together a few rounds out from the centre, just below the middle of the petal (dotted line in the picture below the following paragraph).
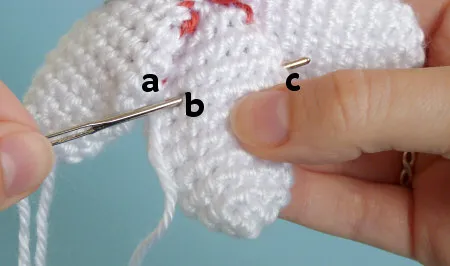
Pointsa,b,care shown on both pictures (above and below). Bring the yarn up at the right edge of one petal (pointa), enter the next petal a couple of stitches in from the left edge (pointb) and then exit that petal at its right edge (pointc). Make sure your stitch only passes through the back layer of the petal, so it won’t be visible from the front.
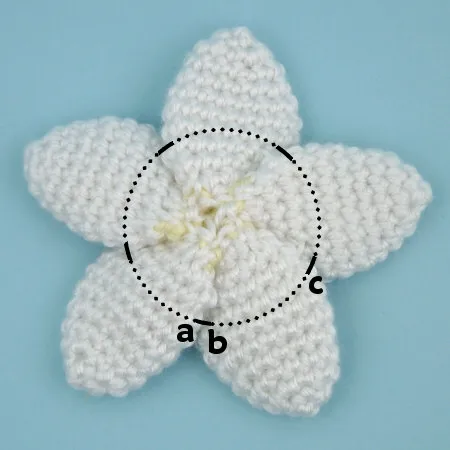
Repeat all the way around the circle, passing the needle from a couple of stitches in from the left edge (b) to the right edge (c) of each petal. When you’ve stitched through all five petals, draw the length of yarn taut so the stitches disappear, and then tie the ends together so the petals will stay together in this position. Lose the ends inside one of the petals.
Backing (optional)Depending on what you’d like to use your blossoms for, the back of the flowers may be visible. The middle of the back may look a little messy, especially if you’ve made a dual-coloured flower. To neaten it up, you can cover that middle part with a crocheted backing, if desired.
Place the backing circle over the middle of the back of the flower. Using a yarn needle and the long yarn end from the backing, stitch the backing to the back of the petals, all around the edge of the backing.
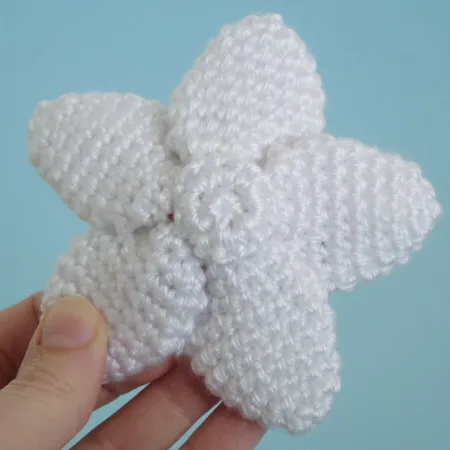
Enjoy your plumeria flowers!