Daffodils crochet pattern Blog
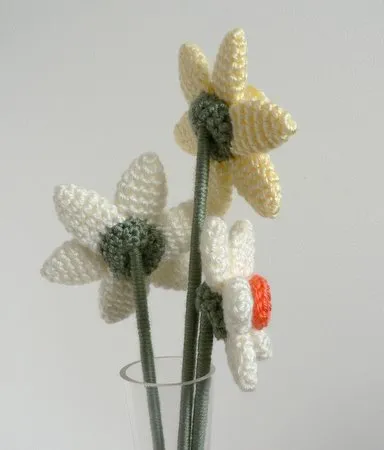
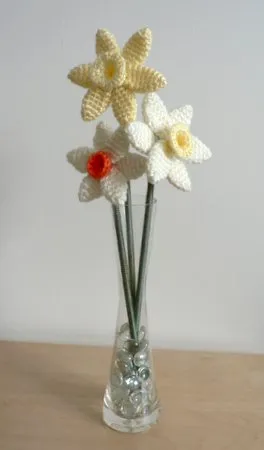
Crochet your own daffodils – perfect for spring! Make a bouquet of yarn flowers, or try one in thread as a beautiful pin or accessory. The pattern includes two different designs for petals and centres – mix and match colours and designs to create your own custom bouquet!
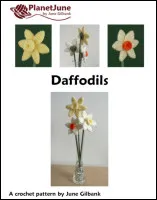
The complete pattern and instructions are available below, regardless of whether or not you choose to pay for them 🙂
Terminology
Notes
- Do not join at the end of each round; rounds are worked in continuous spirals.
- Use a stitch marker to mark the beginning of each round. Move the marker up each time you start a new round.
You will need…
- E US/3.5mm crochet hook
- Small amount of worsted weight yarn in yellow, orange, cream or white, plus green
- Yarn needle
- Stitch marker
I used worsted weight yarn and a size E hook, which produced a large 4″ diameter flower (3.5″ for the smaller flower). Try using a finer yarn or crochet thread with a correspondingly smaller hook to give a more compact flower.
Crochet Instructions
For each flower, you will need:
- 6 petals (choose large petalsorsmall petals)
- 1 centre (choose large centreorsmall centre)
- 1 green backing
Left: small petal; Right: large petal
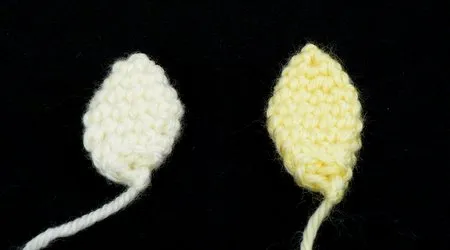
Large PetalMake amagic ring, ch 1.Rnd 1: 4 sc in magic ring. (4 st)Rnd 2: (2sc in next st, sc in next st) twice. (6 st)Rnd 3: (2 sc in next st, sc in next 2 st) twice. (8 st)Rnd 4: (2 sc in next st, sc in next 3 st) twice. (10 st)Rnds 5-7: sc in each st around. (10 st)Rnd 8: (invdec, sc in next 3 st) twice. (8 st)Rnd 9: (invdec, sc in next 2 st) twice. (6 st)Join with sl st to next st. Fasten off and weave in ends.
Small PetalMake amagic ring, ch 1.Rnd 1: 4 sc in magic ring. (4 st)Rnd 2: (2sc in next st, sc in next st) twice. (6 st)Rnd 3: (2 sc in next st, sc in next 2 st) twice. (8 st)Rnd 4: (2 sc in next st, sc in next 3 st) twice. (10 st)Rnd 5: sc in each st around. (10 st)Rnd 6: (invdec, sc in next 3 st) twice. (8 st)Rnd 7: (invdec, sc in next 2 st) twice. (6 st)Join with sl st to next st. Fasten off and weave in ends.
Left: large centre; Right: small centre
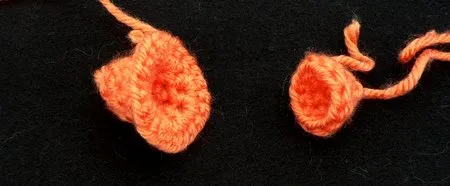
Large CentreCh 8.Rnd 1: sc in 8th chain from hook, to form a circle. Sc in each st around the circle. (8 st)Rnds 2-3: sc in each st around. (8 st)Rnd 4: 3 sc in each st around. (24 st)Join with sl st to next st, fasten off and weave in ends.
Small CentreCh 8.Rnd 1: sc in 8th chain from hook, to form a circle. Sc in each st around the circle. (8 st)Rnd 2: sc in each st around. (8 st)Rnd 3: (2 sc in next st, sc in next st) four times. (12 st)Join with sl st to next st, fasten off and weave in ends.
Backing
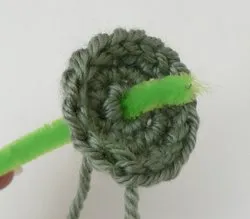
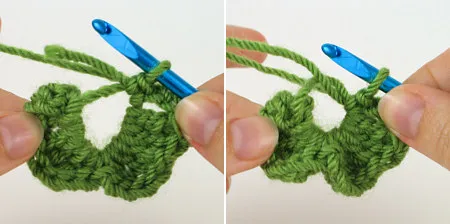
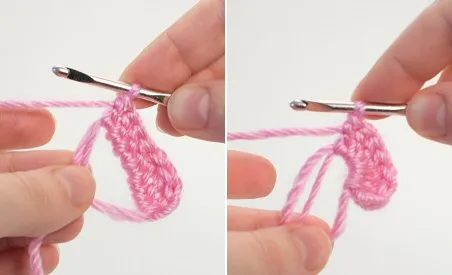
With green yarn, make amagic ring, ch 1.Note: if you’re going to attach a stem to the daffodil, leave a hole for the stem in the middle of the magic ring when you pull the ring closed (see picture, right).Rnd 1: 6 sc in magic ring. (6 st)Rnd 2: 2 sc in each st around. (12 st)Rnd 3: (2 sc in next st, sc in next st) six times. (18 st)Join with sl st to next st. Fasten off, leaving long end of yarn.
Assembly Instructions
PetalsFlatten out each petal. Arrange each group of three petals with their open ends together so they form a trefoil shape:
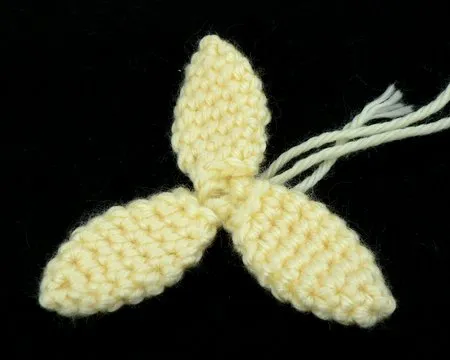
Use a yarn needle and a length of the yarn you used for the petals to join each group of three petals together in this position with a few stitches at the centre of the trefoil. The three petals will still be able to flop about – you don’t need to secure them rigidly together.
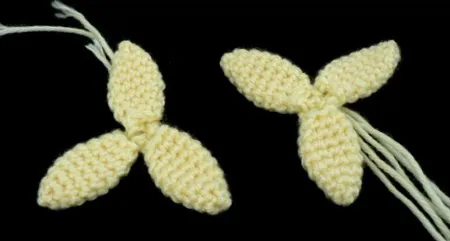
Rotate one trefoil to offset the petals and place it on top of the other, so all 6 petals are visible and equally spaced.
Use a yarn needle and a length of the yarn you used for the petals to stitch the petals together in this position.
Note: Your stitches will not show in the finished daffodil provided you keep them near the centre, so you don’t need to be too concerned with being neat. An effective method is to pass the needle down through the right edge of a top petal and the left edge of a bottom petal, then back up through the right edge of the same bottom petal and the left edge of the next top petal, and continue around in this fashion until all the petals are attached together. Feel free to use any method that makes sense to you – just keep the stitches close to the centre so they will be covered up later.
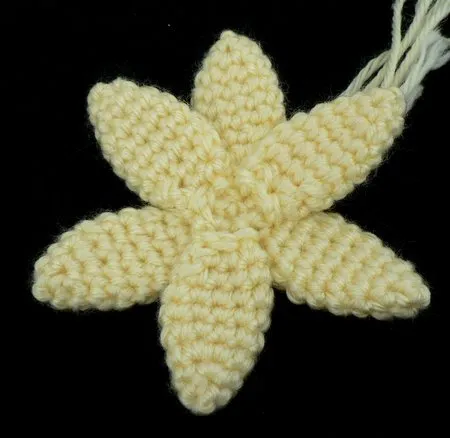
Pull any loose yarn ends through to the back and fasten off.
Centre
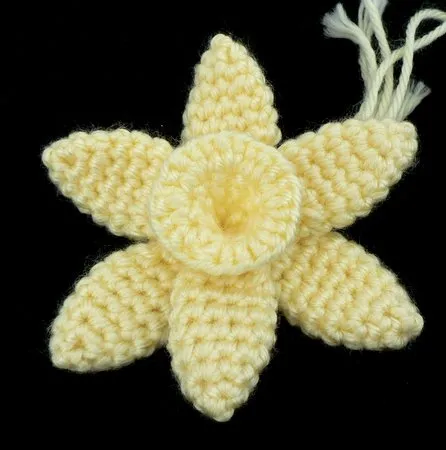
Place the centre over the middle of the flower.
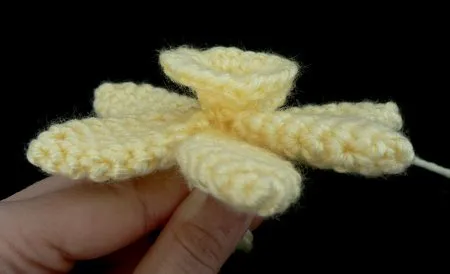
Using a yarn needle and a length of the yarn you used to make the centre, stitch the centre down to the petals. Don’t worry if your stitches show on the back – the back will be covered in the next step. Pull the ends through to the back and fasten off.
Backing
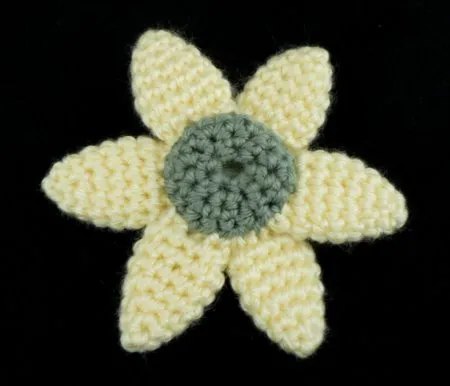
Place the green circle over the middle of the back of the flower. It should cover any exposed ends. Using a yarn needle and the long yarn end from the backing, stitch the edges of the backing to the petals.
Stem
Adding a stem is optional – you could add a pin back instead, or make several daffodils into a floral wreath with some crocheted leaves.
You could make the stem for a thread daffodil from a pipe cleaner, but, as I discovered during this project, a yarn daffodil is too heavy to be supported by a pipe cleaner. My old-school solution was to buy a 3/8″ wooden rod from the hardware store, cut it to length, and then wrap it with green yarn. I spread a little white glue on the rod every couple of inches to anchor the yarn in place. Easy!
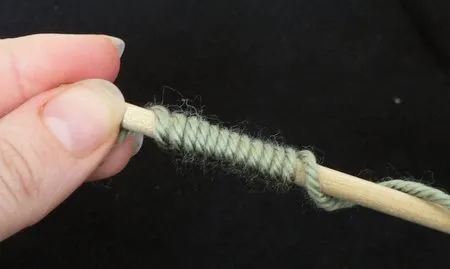
Poke the top of the rod through the hole in the middle of the green flower backing, then angle it so the flower is vertical. If desired, you can tie it in place with more green yarn wrapped through the flower backing and around the stem, but my flowers stay in place without additional support.