Simple Crochet Flower Patterns
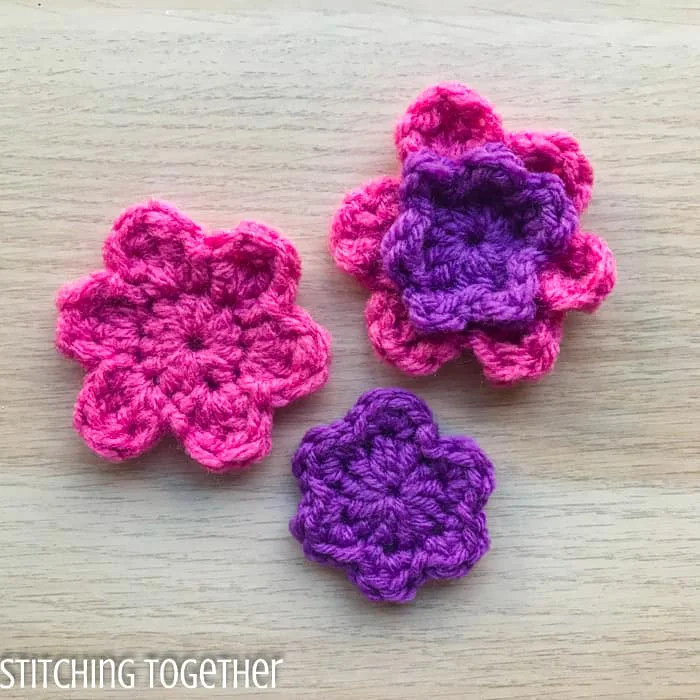
If you are on the hunt for a versatile and charming collection of blooms, look no further than these Simple Crochet Flower Patterns! This fantastic set provides you with beautiful, easy-to-follow designs that are perfect for mixing and matching. Whether you want to create a full, colorful bouquet, add some lovely textured appliques to your favorite garments, or string together a whimsical spring garland, these simple flowers are exactly what you need. They work up in a flash, making them the ultimate stash-busting project for crocheters of all skill levels. Grab your hook and let’s craft a beautiful, blossoming garden!
Materials:
Scrap yarn (the double layer beautiful flower used 0.14 oz of worsted weight yarn)
Crochet hook appropriate for the yarn (Did you know you can get my FAVORITE crochet hooks right on Amazon)
Large eye tapestry needle
Abbreviations:
ch(s): chain(s)
hdc(s): half double crochet(s)
sl st: slip stitch
st(s): stitch(es)
dc(s): double crochet(s)
tr(s): treble crochet(s)
FLO: Front Loop Only
BLO: Back Loop Only
How to crochet a flower step by step
-
start with a magic ring.
-
hdc 12 times in the ring and tighten to close, join with a sl st to the first hdc.
-
without chaining, (sc, hdc, sc) in the first st where you joined your sl st in the round before, sl st to the next st, *(sc, hdc, sc) in the next st, sl st to the next st, repeat from * around, join with a sl st to the first sc, fasten off and weave in ends.
Save the free crochet flower patterns on Pinterest
Center of the Crochet Flowers
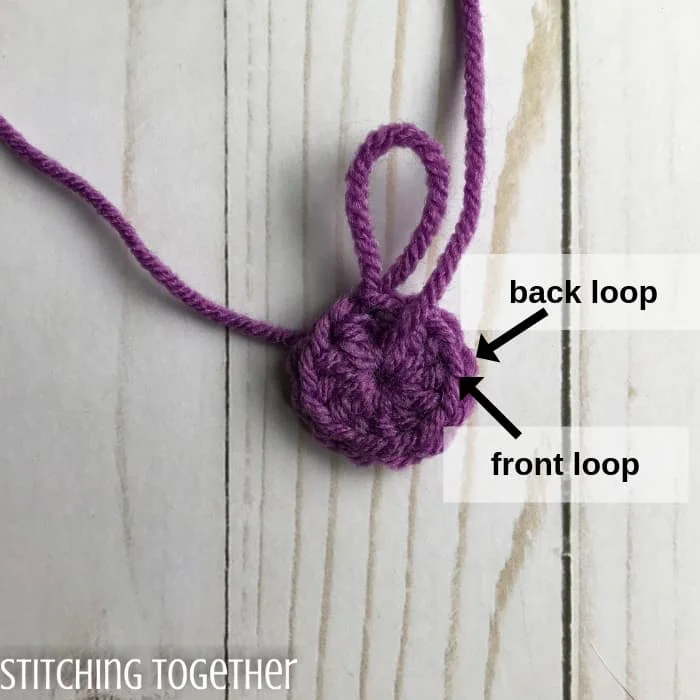
All of the crochet flowers start with the same ring of half double crochets. The great thing about starting with a ring of hdcs is that you can change which loops you use and get a different look for the center of the flower or add layers like in the double-layer crochet flower.
Before we jump into the crochet flower patterns, let’s start with the hdc ring and make sure we understand the loop placement on the right side and wrong side of the starting ring.
Start with a magic ring, ch 1, hdc 12 times in the loop and tighten to close, join with a sl st to the first hdc.
Here is the hdc ring from the right side. Notice you can see the front loop and back loop of each half double crochet.
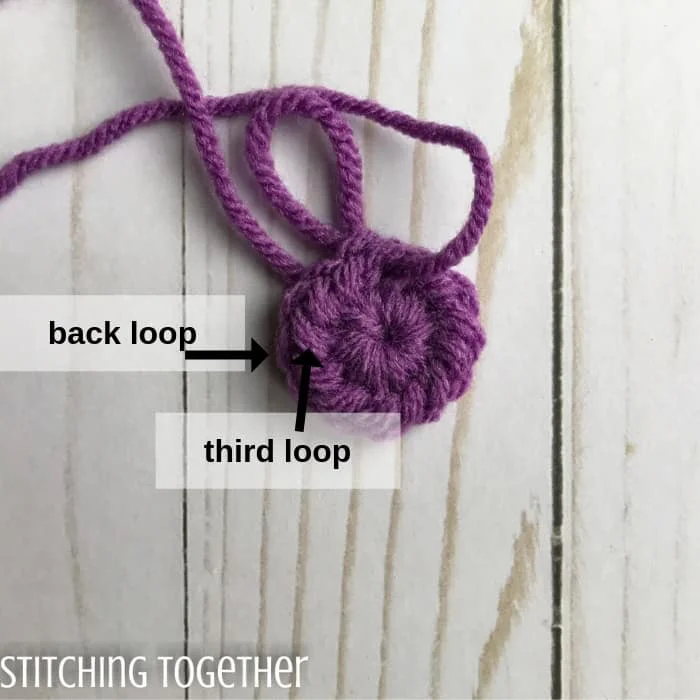
When you turn the ring over, you can see the back loop and that third loop of the half double crochet. Checking for the third loop is a quick way to tell if you are looking at the right side or wrong side of the starting ring.
Small Crochet Flower Pattern
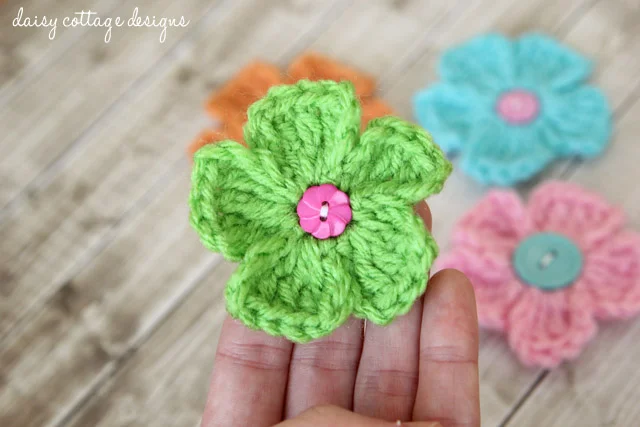
Let’s start with the small crochet flower first. This quick crochet flower pattern is perfect for adding to a headband, barrettes, stringing together for a garland, or any other place you think could benefit from a cute flower.
Because it uses the least amount of yarn, this flower is also great for busting through those small bits of scrap yarn – I couldn’t even get it to register on my scale! It only measures about 2″ across when using worsted weight yarn and a 5.0 mm crochet hook.
Small and easy crochet flower – Written instructions
Round 1: Start with a magic ring, ch 1, hdc 12 times in the ring and tighten to close, join with a sl st to the first hdc.
Round 2: without chaining 1, (sc, hdc, sc) in the same st where you slip stitched to join the hdc ring, sl st to the next st, *(sc, hdc, sc) in the next st, sl st to the next st, repeat from * around, join with a sl st to the first sc, fasten off and weave in ends.
Small and easy crochet flower – Step by step photo instructions
Start with the ring of 12 hdcs, without chaining 1, sc in the same st where you slip stitched to join the hdc ring
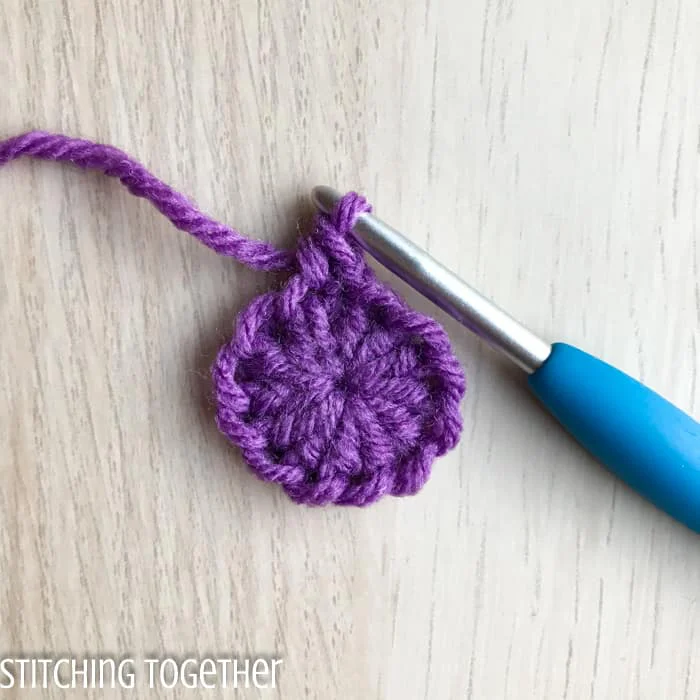
hdc in the same st
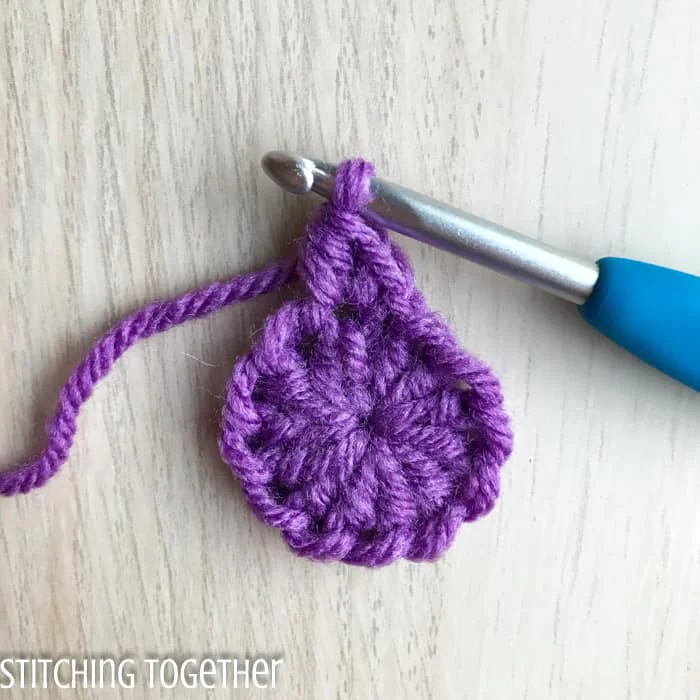
sc in the same st
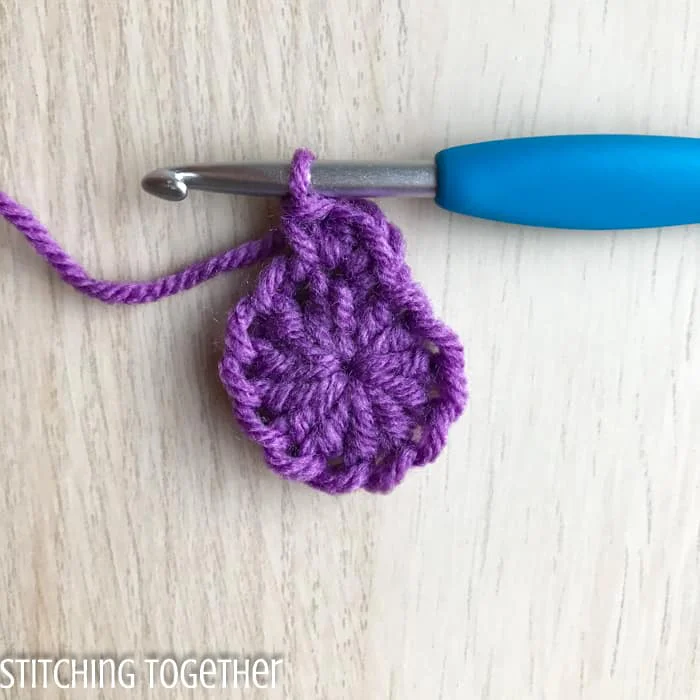
sl st to the next st
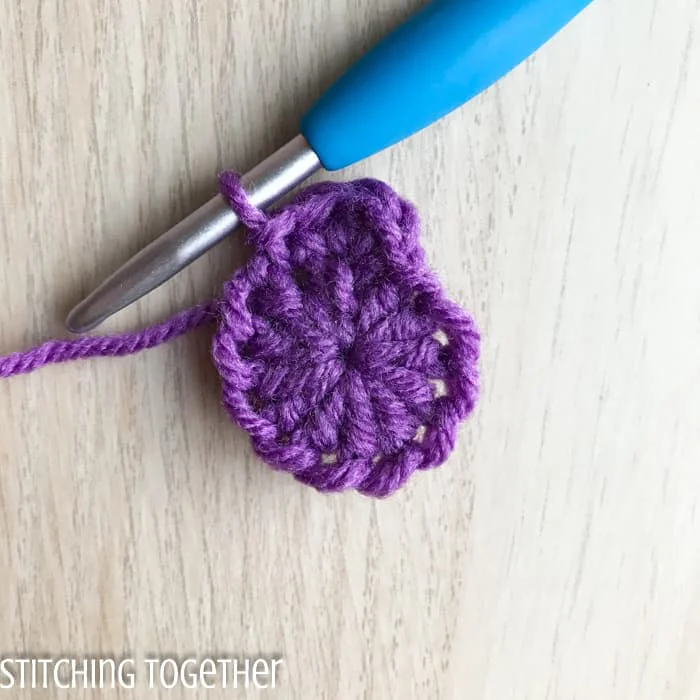
Continue putting a (sc, hdc, sc) in the next st then sl st to the next st
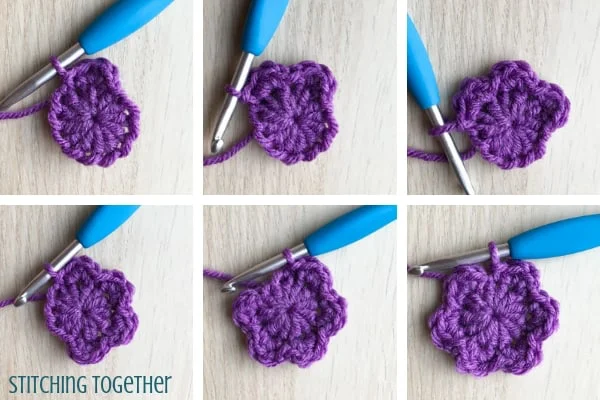
To finish the flower sl st to the first sc.
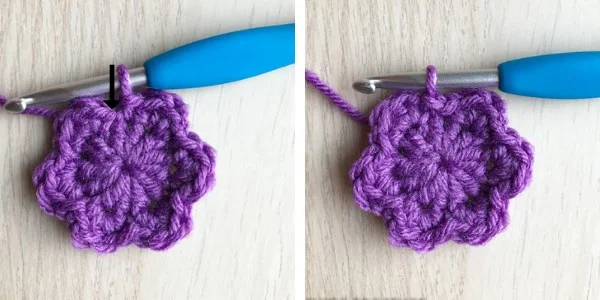
Fasten off and weave in ends. (Isn’t it so cute?)
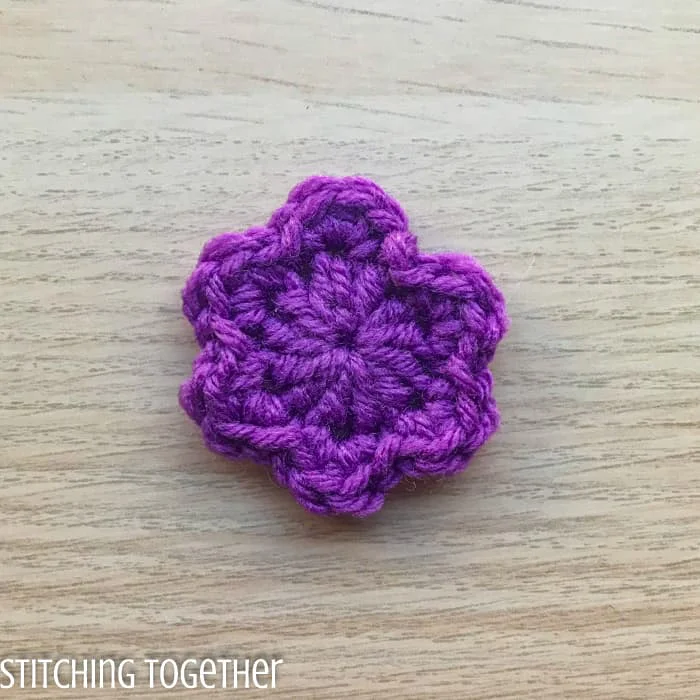
6 Petal Crochet Flower Pattern
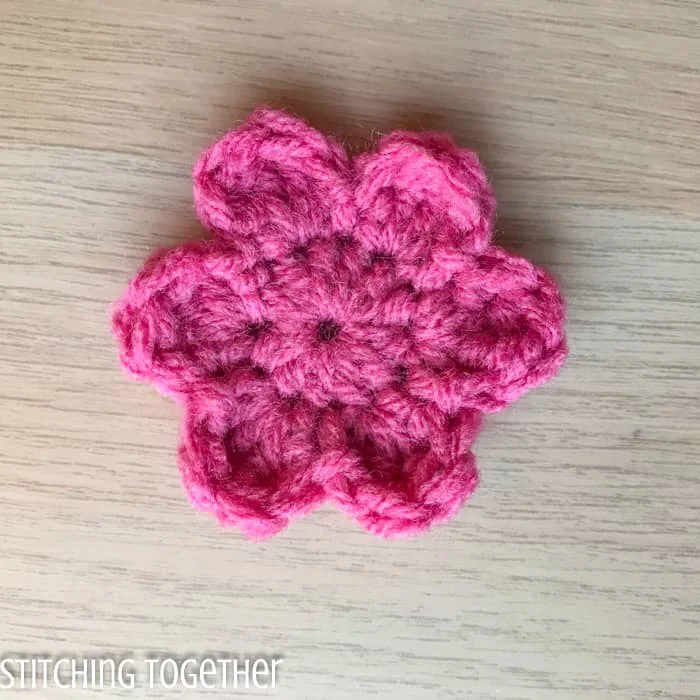
It is true both the little flower and this one have 6 petals, but the petals are more pronounced in this larger flower, so it gets the title of 6 petal crochet flower. Plus, I couldn’t call it a large flower since it is only slightly larger than the small flower measuring about 2.5″ across.
6 Petal Flower Pattern – Written Crochet Pattern
Round 1: Start with a magic ring, ch 1, hdc 12 times in the ring and tighten to close, join with a sl st to the first hdc.
Round 2: without chaining 1, (dc, 2 tr, dc) in the same st where you slip stitched to join the hdc ring, sl st to the next st, *(dc, 2 tr, dc) in the next st, sl st to the next st, repeat from * around, join with a sl st to the first dc, fasten off and weave in ends.
6 Petal Flower Pattern – Step by step photo instructions
Start with the ring of 12 hdcs, without chaining 1, dc in the same st where you slip stitched to join the hdc ring
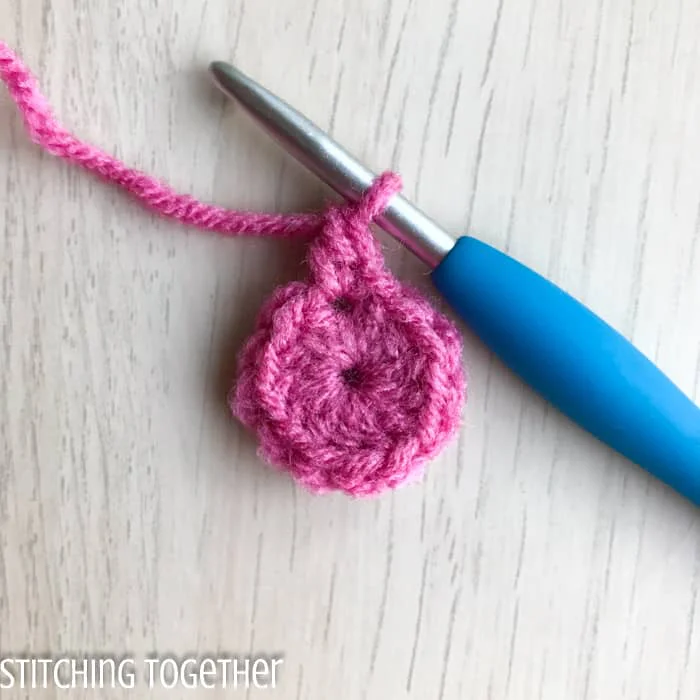
2 tr in the same st
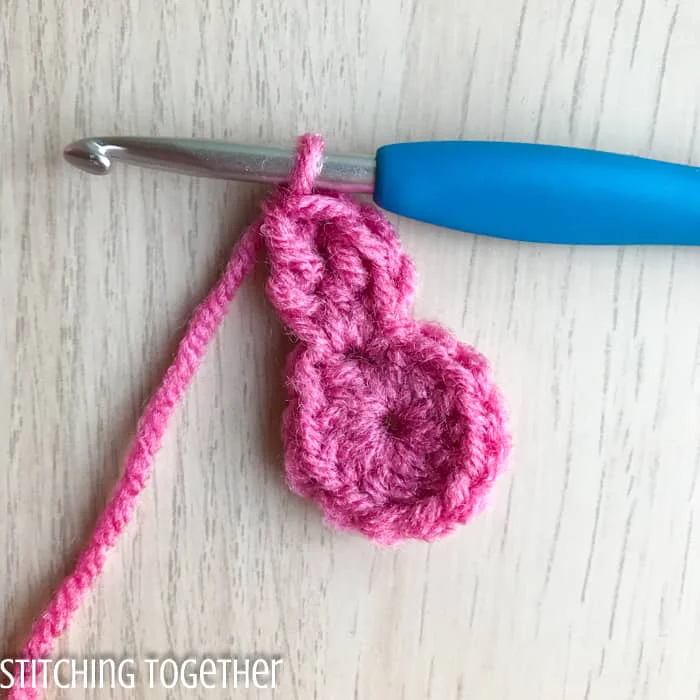
dc in the same st and sl st to the next st
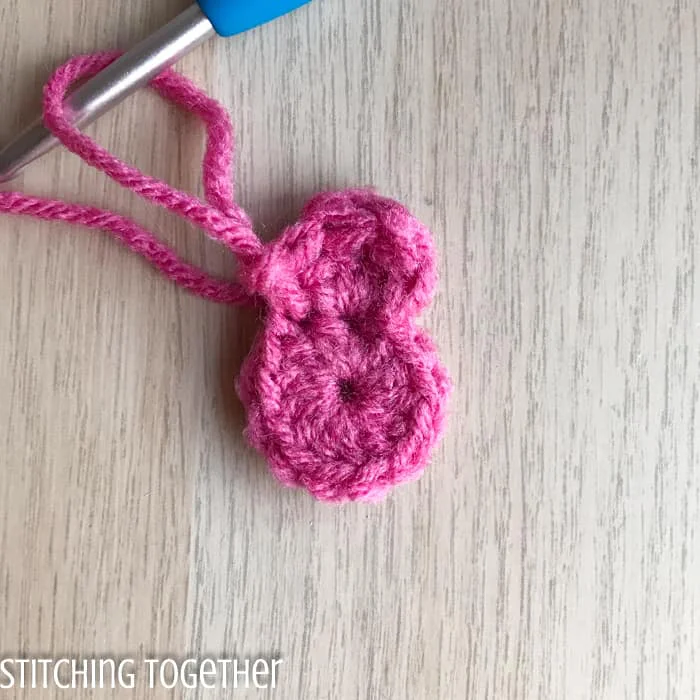
Continue putting a (dc, 2 tr, dc) in the next st then sl st to the next st 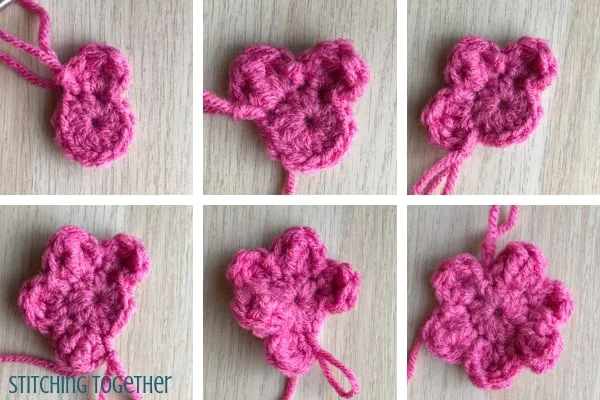
The petals may need a little massaging to get them in place or for an extra crisp flower, you could block it.
Double Layer Crochet Flower Pattern
The double layer crochet flower combines the small crochet flower with the larger 6 petal flower to form flower with 2 distinct layers of petals.
Crochet Double Layer Flower – Written Instructions
Round 1: Start with a magic ring, ch 1, hdc 12 times in the ring and tighten to close, join with a sl st to the first hdc.
Round 2: without chaining 1 and working in the FLO, (sc, hdc, sc) in the FLO of same st where you slip stitched to join the hdc ring, sl st to the next st, *(sc, hdc, sc) in the next st, sl st to the next st, repeat from * around, join with a sl st to the first sc, turn so the wrong side is facing you.
Round 3: sl st to the back loop directly behind the last front loop you worked into or if switching colors, join the yarn through a back loop, working in the BLO, *(dc, 2 tr, dc) in the next st, sl st to the next st, repeat from * around.
Crochet Double Layer Flower – Step by step photo instructions
Start with a small crochet flower with the petal round worked in the front loop only, sl st to the back loop directly behind the last front loop you worked into or if switching colors, join the yarn through a back loop,
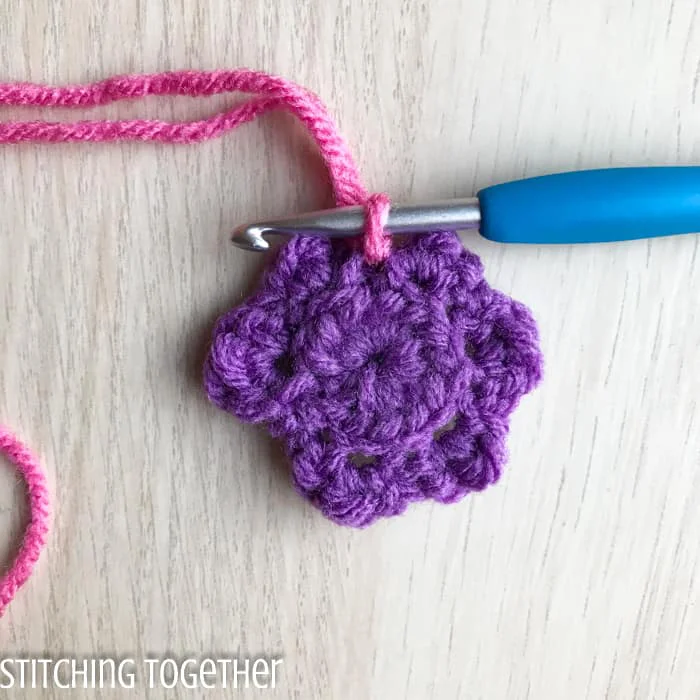
dc in the same loop
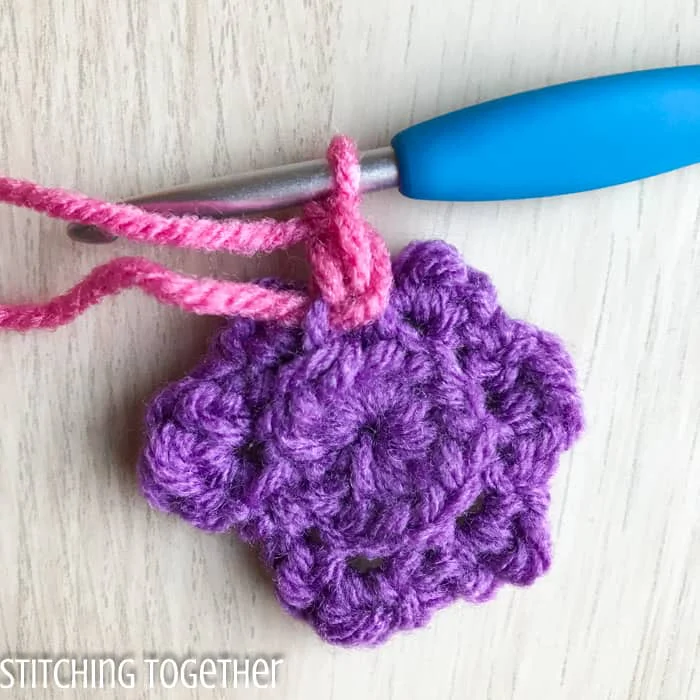 2 tr, dc in the same loop
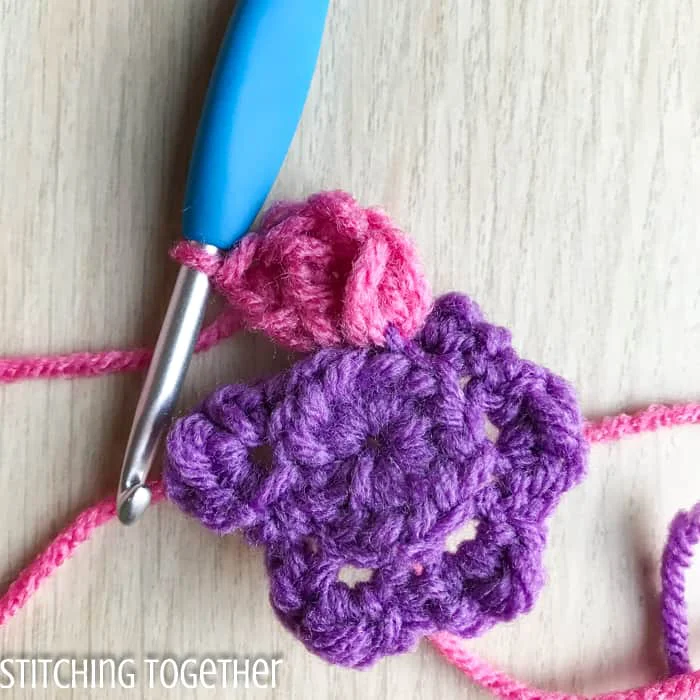 sl st to the next st
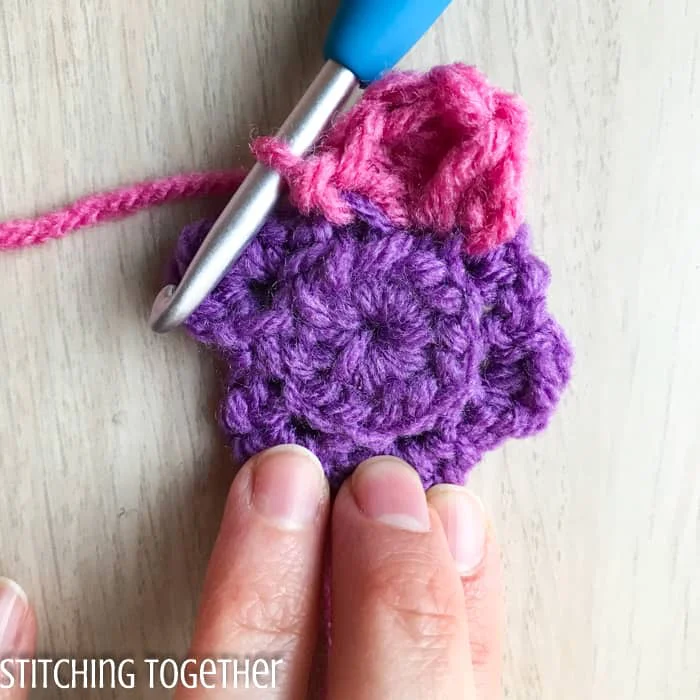 continue around, join with a sl st to the first dc, fasten off and weave in ends.
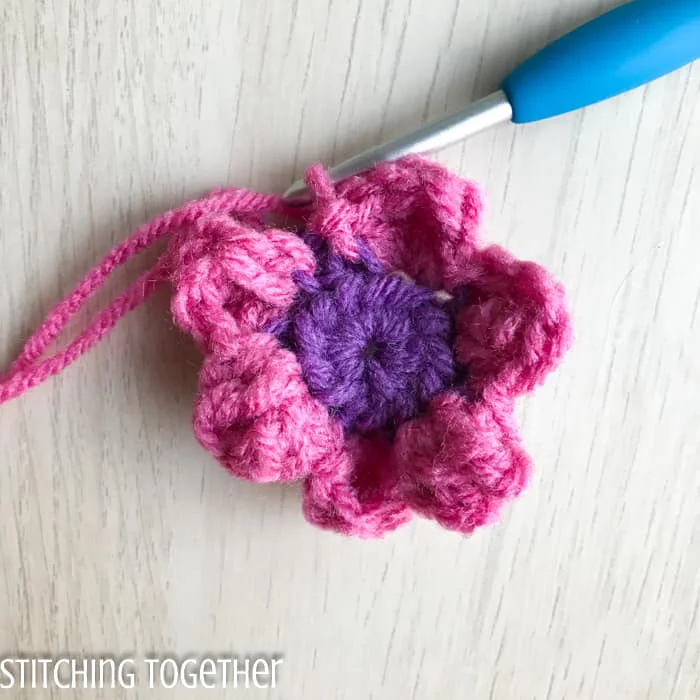 Depending on the size of hook you use (I used an H hook with Red Heart Super Saver) your flower may look a little squished.
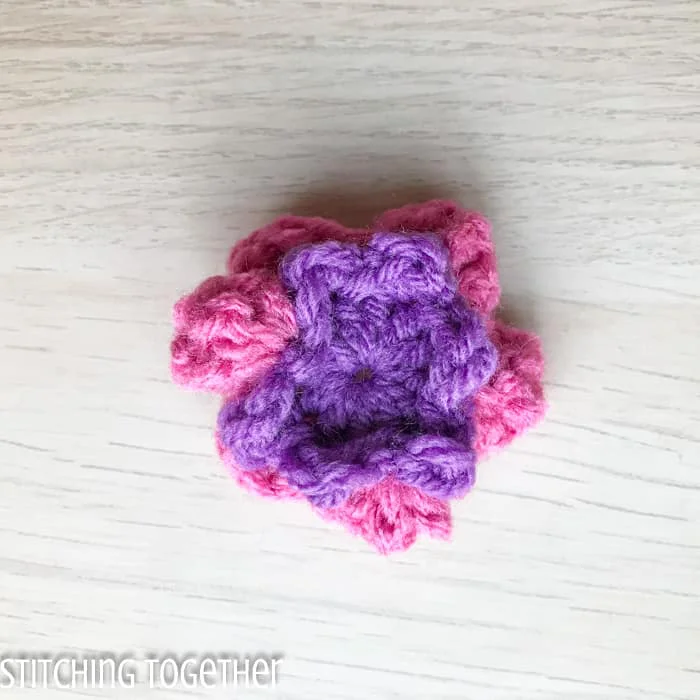 Pushing the middle of the petals toward the back will help it to lay flatter but still have depth.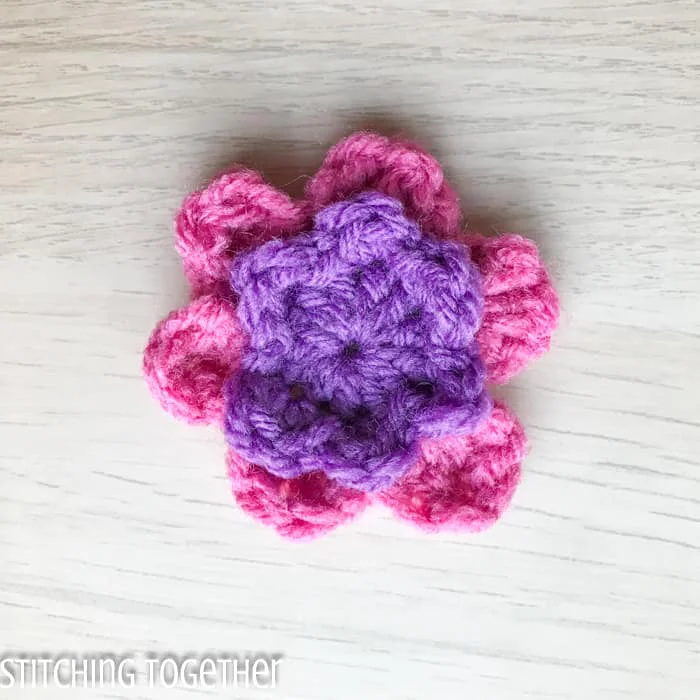
If you are feeling extra adventurous I am sure you could add another layer of petals by crocheting a round of dcs into the 3rd loops and then add a petal row following the 6 petal flower instructions!
These flowers would be a great addition to spruce up the Cities Circle Bag or as an accessory to the Kensington Bolero.
Where will you use these adorable flowers? Let me know in the comments!
Will you let me know and share pics of your finished projects? You can do that several ways:
- Tag Stitching Together on Instagram with @stitching_together and use the #stitchingtog
- Upload your picture in the Tried It section of this pin
- Save your project on Ravelry and link it to this pattern
- Share your work in the Stitching Together Community.
This pattern PDF can also be purchased on Etsy or on Ravelry.
Related: Simple Small Sunflower Crochet Pattern