Basic Rose crochet pattern Blog
This basic rose pattern is a perfect introduction to crocheted flowers, and it’s so versatile – make it in any size and colour you like!
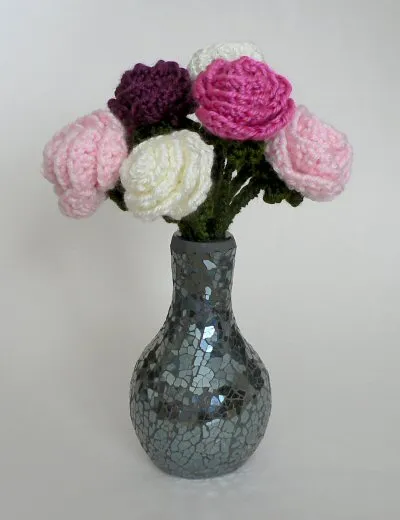
Here are some ideas for use:
- Use the optional stem pattern below to create a whole vase of roses
- Stitch a pin to the back of a rose to make a pretty brooch
- Accessorize a bag by sewing on a couple of roses
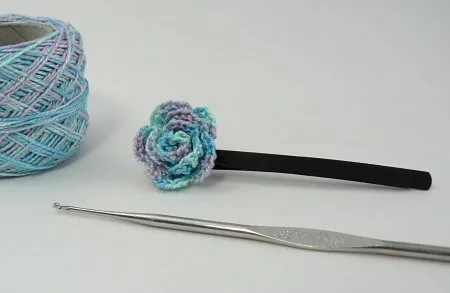
- Sew or glue a small rose to a hair clip or plastic hairband
The complete pattern and instructions are available below, regardless of whether or not you choose to pay for them 🙂
Terminology
You will need…
- A suitably sized crochet hook*
- Small amount of yarn* in a floral colour, e.g. pink, red, purple, yellow, orange, cream or white (plus green for the optional stem)
- Yarn needle (or embroidery needle for a thread rose)
* Hook and yarn sizes:This pattern will work with any size yarn, provided you choose a suitable hook size for your yarn. For my roses, I used:
- Worsted weight yarn and a size G (4mm) hook, which produced a 2″ diameter rose
- Size 8 pearl cotton and a size 7 (1.5mm) hook, which produced a 3/4″ diameter rose
Crochet Instructions
Ch 46.Row 1: sc in 2nd chain from hook and in each chain across. (45 st). Ch 1, turn.Row 2: sc in first st, [skip next st, (dc, ch 1, dc, ch 1, dc, ch 1, dc) in next st, skip next st, sc in next st] 11 times.Fasten off and cut yarn, leaving a long end for stitching the rose together.
After completing Row 2, your rose should look like this (except it won’t lie straight like this!). In this picture, the scalloped edge is at the top and the flat edge is at the bottom.
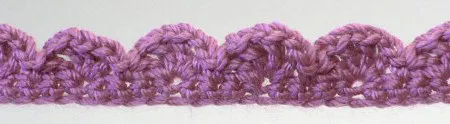
If you look at your work, you’ll see that one edge is flat and the other edge is scalloped. Starting at the opposite end of your work to the long yarn end, begin to roll up the rose into a spiral, and roll so that the flat edge stays flat.
Watch thebackof the rose as you roll, and form the flat edge into a flat spiral
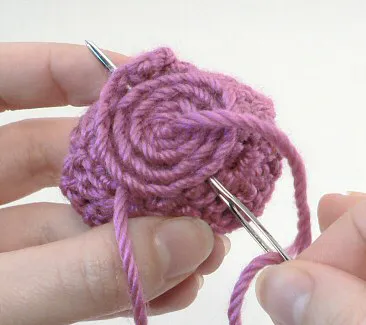
Thread the long yarn end with a yarn needle, then run the needle through all the layers of the flat edge from one side to the other, passing through the centre of the rose. Draw the yarn taut, but do not pull it tightly to compress the bottom of the rose – you want to maintain that flat spiral shape at the back. Rotate the rose and go back through the centre, passing through all the layers again. Rotate once more and stitch back through again. Fasten off and weave in both ends of the yarn.
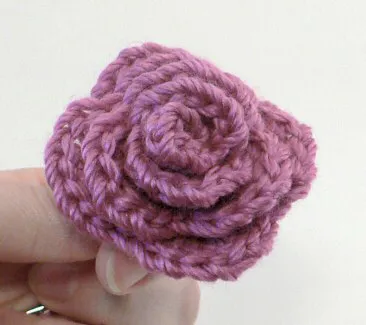
The front of the rose after stitching
Optional: Stem
Terminology: The green outer parts of the flower that sit at the flower’s base are called thecalyx.
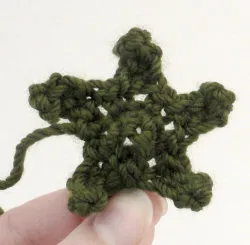
CalyxCh 5.Rnd 1: sc in 5th chain from hook, to form a circle. Sc in each st around the circle. (5 st)Rnd 2: (sc in next st, ch 4, sc in 2nd chain from hook and in next 2 chains) five times. Fasten off and weave in ends.
Star-shaped calyx
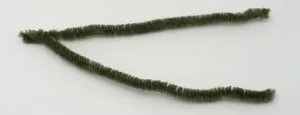
StemTo make the stem, use a pipe cleaner or length of floral wire. Fold it in half and make a twist by the fold (you may need pliers to help you with this if you are using a stiff wire).
Folded pipe cleaner stem (or use floral wire)
The points of the star shaped calyx will want to curl. Make sure they are curling down, away from the rose.
Poke the twisted end of the wire up inside the centre of the calyx, so it sticks out of the top by about 1cm. Thread a yarn needle with your green yarn, directly from the yarn ball, and stitch the stem in place by stitching through the base of the calyx and between the two arms of the stem with a couple of stitches. Remove the needle but do not cut the yarn if you plan to cover the stem with yarn (as explained below).
Twist the rest of the stem wires together.NOTE:For safety, I like to fold up the very ends of the pipe cleaner or floral wire, so there aren’t any sharp points at the base of the stem.
You can either leave the wires uncovered, or, for a more polished look, cover the stem with the green yarn. Here are two simple methods to cover the stem:
- Single crochet around the stem. This will leave a row of chains down one side of the stem. Fasten off and weave the end back up through a few stitches.
- Wrap the yarn around and around the stem. Knot the yarn around the end of the stem and secure the knot in place with glue before cutting the yarn.
Wrapping yarn around a pipe cleaner stem
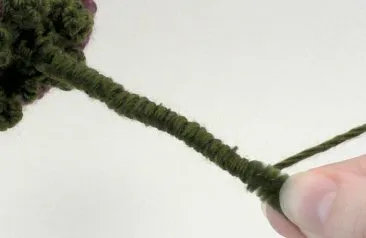
This stem is single crocheted around floral wire(note also the green floral wire sticking out of the top of the calyx)
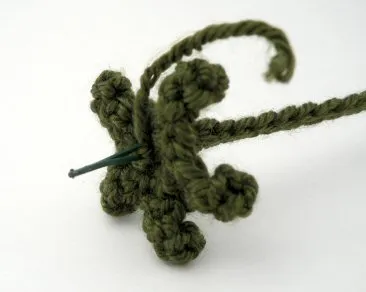
Poke the visible end of the wire up through the back of the rose, to help anchor it in position. (NOTE:Make sure the wire is not visible from the top of the rose! If it is too long and is visible, fold it down inside the rose.)
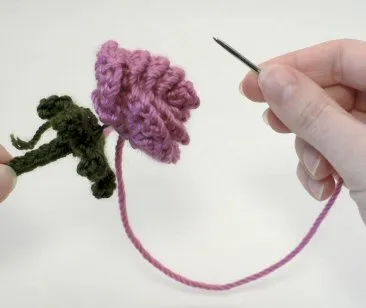
With a yarn needle and a length of either yarn, stitch the base of the rose to the calyx. Weave in all remaining yarn ends.
Stitching the rose to the calyx